Have you ever wanted your favourite song to sound even better?
Spotify has many features in its settings menus that allow users to control and customise how their music plays and sounds. Along with Automix, Crossfade, and Audio Quality, the most influential setting to adjust to control how your music sounds is the Equaliser.
What is an Equaliser?
Referred to as a Graphic Equaliser, or ‘EQ’ for short, an Equaliser is a piece of equipment used by producers and sound engineers which boosts the volume of a specific frequency.
With this in mind, you can control the music you are listening to on Spotify using its built-in EQ the same way.
How Do I Use Spotify’s Equaliser?
Just go to Settings > Playback, and then scroll down to the ‘Equaliser’ setting. Play a song that you are familiar with, and try adjusting the frequency sliders on the EQ and how they adjust the sound quality.
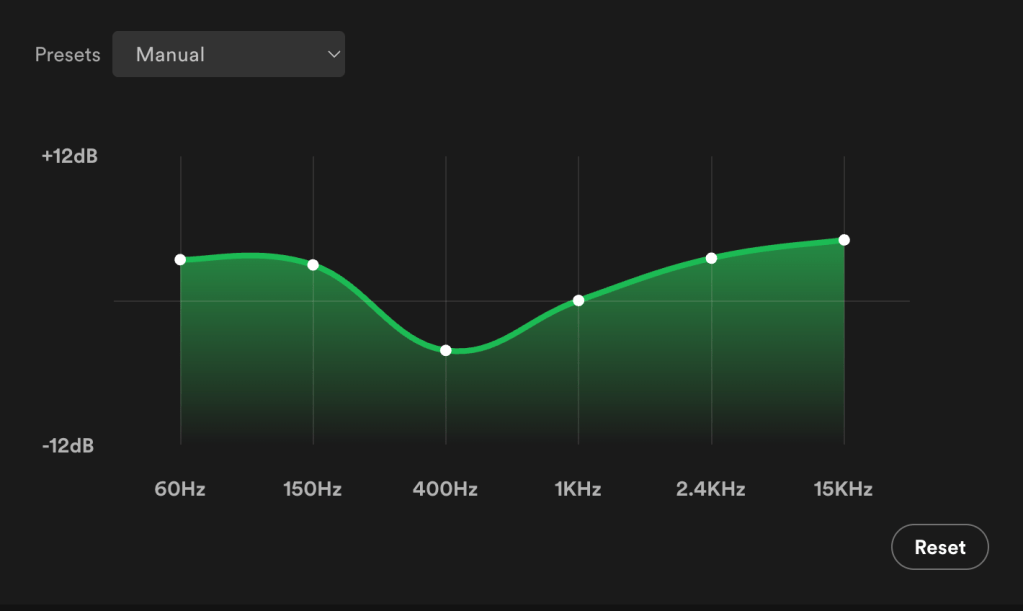
The sliders on on the left-hand side of the graph, around the 60Hz to 150Hz area, are the ‘bass’ sound controllers. If you slide these up and down, you should hear the bass parts in the song being boosted and limited.
The sliders in the middle, around the 400Hz to 1KHz area, are the ‘mids’. If you have a speaker set up in a corner of a room, you will often notice that these mid frequencies are naturally boosted due to the way the sounds bounce off the walls in your room. Try limiting these frequencies by a few dB and the overall sound clarity should improve.
Finally, the sounds on the right-hand side controls the high frequencies, like the hi-hats on drums. Depending on the speaker you have, these frequencies should be boosted to improve the clarity of the sound.
I often do this when I play music on a speaker. Some speakers have very low bass sound and a really high treble, but using the equaliser you can make even a cheap and cheerful speaker sound good.

Leave a comment